


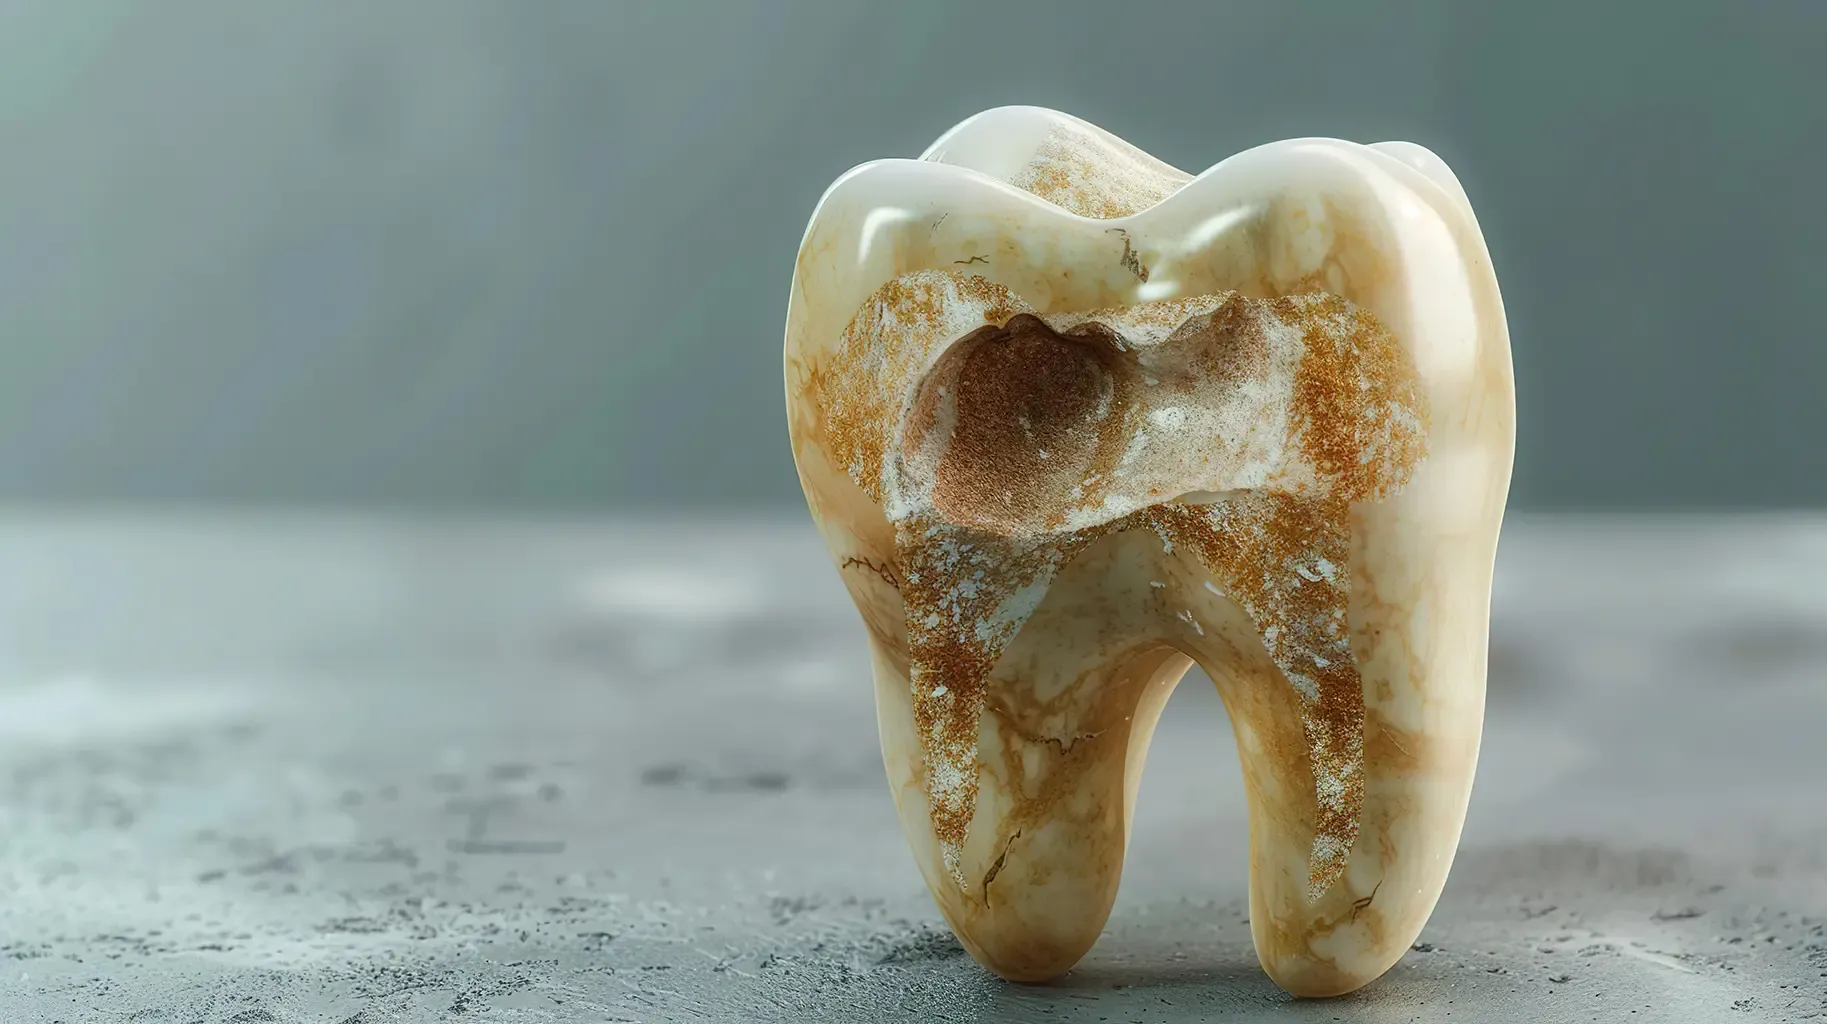
In its earliest stage, a cavity looks like a chalky, opaque white spot on the tooth surface. As decay progresses and breaks through the enamel, it transforms into a visible shadow, a yellowish-brown discoloration, and eventually a distinct black hole or structural pit in the tooth.
You notice something on your tooth. Maybe it is a dark smudge near the gumline, a fine black line tracing a groove in your molar, or a faint white patch you have never seen before. Is it a stain from your morning coffee? Or something worse?
The honest answer is that the visual difference between a harmless surface stain and an active cavity can be surprisingly subtle in the early stages. Understanding what each stage of tooth decay actually looks like, and where to look for it, gives you a significant advantage. Catching decay in its first or second phase can mean the difference between a simple fluoride treatment and an expensive root canal.
This guide breaks down every stage of cavity formation by appearance, explains how the look of decay changes depending on its location in the mouth, and walks you through a four-step self-check you can perform at home with nothing more than a mirror and good lighting.
Visual Identification Guide: What Each Stage of Cavity Formation Looks Like
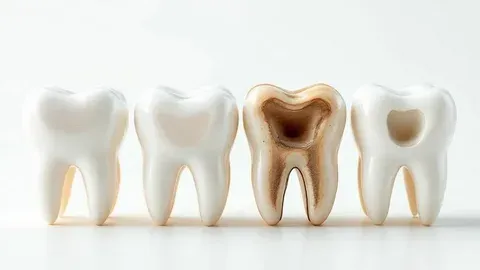
Tooth decay does not appear overnight. It moves through distinct physical phases, each with its own visual signature. The table below maps out what you are likely to see at each point in the progression.
Stage 1: Chalky White Spots
Mild, opaque white lesions along the gumline or within chewing grooves. The enamel is actively losing minerals but has not yet fractured or broken down. This is the only stage at which the cavity process can be fully reversed, typically through prescription fluoride paste and remineralization therapy. Switching to a high-fluoride toothpaste and eliminating acidic foods at this point can halt further damage entirely.
Stage 2: Enamel Decay (Brown or Grey Discoloration)
The original white lesion shifts to a light brown, tan, or greyish hue. The surface has begun to soften structurally. Once the enamel has eroded to this degree, the physical structure cannot regenerate on its own. A minor composite filling, often tooth-colored, becomes necessary to restore the surface.
Stage 3: Dentin Infiltration (Dark Hole or Pit)
A visible black or dark brown pit forms in the tooth. Food traps frequently in the gap, and brushing no longer clears the area properly. Decay spreads considerably faster once it reaches the dentin layer beneath the enamel, because dentin is significantly softer tissue. Prompt dental restoration is critical at this stage to prevent the infection from reaching the nerve.
Stage 4: Pulp Involvement (Deep Shadow or Hollowed Appearance)
The tooth may appear hollowed out, deeply discolored, or cast a severe grey shadow beneath the surface. The living nerve tissue inside the root canal is now infected or dying. Treatment at this stage typically requires root canal therapy or surgical extraction.
How Cavities Look Depending on Their Location in the Mouth
Not all cavities present as classic holes on the biting surface of a molar. The location of the decay dramatically changes what you see, and in some cases, what you cannot see at all without professional imaging.
What Do Cavities Between Teeth Look Like?
Interproximal cavities, those forming between two adjacent teeth, are nearly impossible to detect with the naked eye in early development. The first visible sign is often a dark, smoky shadow visible beneath the translucent enamel when you view the side of the tooth at an angle under strong light. As the decay deepens, the enamel surface above the cavity can collapse, creating a structural gap where floss consistently shreds or snaps during use.
What Do Cavities on Chewing Surfaces Look Like?
Pit and fissure cavities form in the deep grooves of back molars and premolars. They tend to appear as thin, dark lines almost resembling ink tracks running along the natural crevices of the tooth. Tiny black dots clustered in a groove pattern are another common early indicator. Because these grooves are naturally narrow and deep, even a toothbrush cannot always reach the bacteria accumulating within them.
What Do Gumline Cavities Look Like?
Smooth surface cavities along the gumline are particularly common in individuals with chronic dry mouth or high-sugar diets. Visually, they produce a crescent-shaped band of white, yellow, or brown discoloration that runs parallel to the gum tissue. Unlike staining from coffee or tobacco, which tends to be irregular in shape, these bands follow the contour of the gum line with notable consistency.
The 4-Step Home Mirror Check for Spotting Early Cavities
If you are unsure whether a mark on your tooth is a stain or active decay, this diagnostic sequence can help you assess the situation before your next dental appointment.
Step 1: Dry the Tooth Surface Completely
Saliva masks early decay. Blot the tooth dry with a clean cotton swab or tissue under a bright, direct light source. Active early cavities will appear dull and chalky-white when dry. Healthy enamel, by contrast, looks shiny and translucent. This single step reveals lesions that are completely invisible on a wet tooth surface.
Step 2: Perform a Gentle Textural Test
Using the rounded tip of a clean toothpick, glide gently across the discolored area. If the surface feels smooth, hard, and glass-like, the mark is most likely a surface stain from coffee, tea, or tobacco. If the toothpick catches on the surface, drops into a small depression, or produces a sticky or spongy sensation, the enamel has structurally failed at that point.
Step 3: Apply a Temperature Trigger
Rinse your mouth with ice water, or take a small sip of hot coffee. Stains do not produce any thermal response whatsoever. If you feel a sharp, localized ping of sensitivity that lingers for more than a few seconds after the liquid is gone, the decay has likely breached the enamel and is now affecting the dentin or deeper tissue underneath.
Step 4: Examine the Surrounding Gum Tissue
Look closely at the gums surrounding the tooth in question. Puffy, red, or bleeding gum tissue localized specifically around a single tooth, rather than across a broad area, often signals bacterial buildup and food impaction caused by a structural gap in the tooth. Generalized gum inflammation points to gum disease, but isolated redness at one site is a notable red flag for cavity activity.
What to Do After You Spot a Potential Cavity
Home checks are genuinely useful for early awareness, but they cannot replace clinical diagnosis. Interproximal cavities, in particular, require dental X-rays to detect accurately because the decay is entirely hidden between teeth. A visual inspection at home will miss them almost every time.
The most important takeaway from this guide is that timing matters enormously. Stage one decay is the only phase that can be reversed without drilling. Stage two requires a filling. Stages three and four involve progressively more invasive and costly procedures. Identifying a chalky white spot and acting on it immediately is one of the most cost-effective decisions you can make for your long-term oral health—just as recognizing early symptoms in other health conditions, such as reviewing psoriasis vs eczema and how to tell the difference, allows for timely and effective care.
If anything from the visual guide or the home check raised a concern, book a dental appointment this week rather than waiting for your next routine visit. Decay accelerates once it breaches the enamel, and the window for conservative treatment narrows quickly.
Frequently Asked Questions
What does a cavity look like in its very earliest stage?
At its earliest stage, a cavity looks like a small, chalky white spot on the tooth surface. The spot appears dull rather than shiny and is most commonly found along the gumline or within the deep grooves of molars. At this point, the enamel is losing minerals but has not yet broken down structurally, meaning the process can still be reversed with fluoride treatment.
Can a cavity look like a black dot or line?
Yes. Black dots or thin dark lines in the grooves of back molars are a common appearance of pit and fissure cavities. These form in the natural crevices of chewing surfaces and can be mistaken for food staining. A toothpick test or dental probe can help distinguish staining from structural breakdown at the surface.
How do you tell the difference between a stain and a cavity at home?
The key distinctions are texture and thermal sensitivity. Stains sit on the surface of the enamel and feel smooth and hard to the touch. Cavities feel sticky, soft, or create a physical catch when a toothpick tip passes over them. Stains also produce no sensitivity response to hot or cold liquids, while cavities often trigger a sharp, lingering pain.
Do all cavities eventually turn into visible black holes?
No. Interproximal cavities, which form between teeth, rarely produce a visible black hole on the outer surface. Instead, they appear as a shadowy discoloration beneath the enamel or cause the enamel to collapse inward at the contact point between two teeth. Without X-ray imaging, these cavities are frequently undetected until they are in an advanced stage.
At what stage does a cavity stop being reversible?
A cavity stops being reversible once it has progressed past the initial white spot phase. As soon as the enamel surface has physically softened or broken down, the tooth cannot regenerate that lost structure on its own. From stage two onward, professional dental intervention is required to stop further decay and restore the tooth.
If you found this guide helpful, explore our trusted health resources for more evidence-based information on medical conditions, treatments, and healthy living.